
When it comes to Halloween decorations, the sky is really the limit. For some of us, there is nothing like getting out and doing some decorating around the house. Some people may wait till December and decorate for Christmas but if you’ve got the itch and enjoy celebrating the holidays, you may want to consider putting some things out for Halloween.
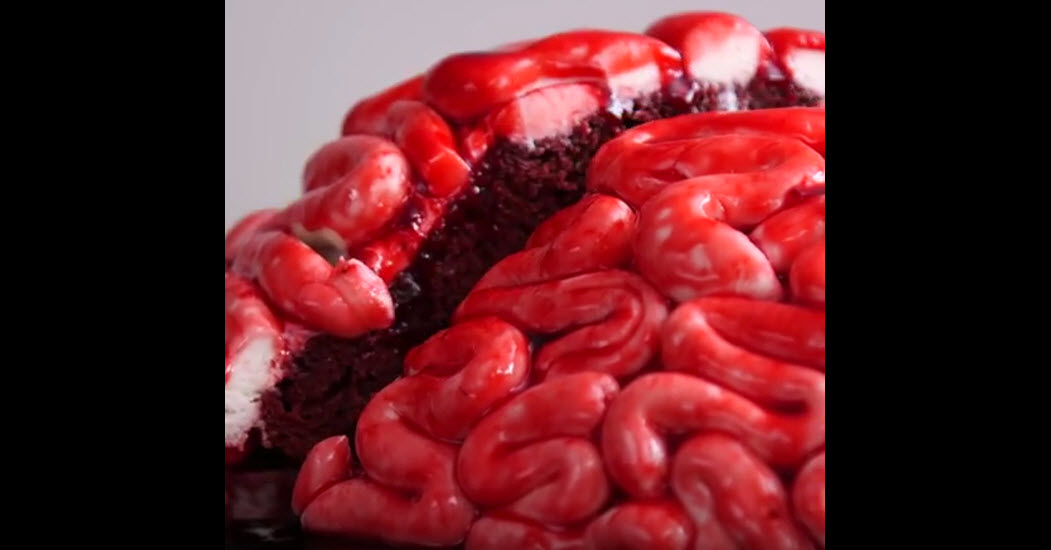
What is Halloween without parties? If you enjoy going to parties or if you would like to throw one, you can actually be the life of the party when you make this unique cake. It looks exactly like brains and it is authentic looking enough that it may just fool some people. It is also easy to make, so you can have it ready for a party tonight.
Ingredients:
1 box red velvet cake mix + ingredients required on the box
1 container buttercream frosting
1 package marshmallow fondant (or see homemade recipe below)
ivory gel food coloring
For the marshmallow fondant:
16 ounces white mini marshmallows
2-5 tablespoons water
2 pounds (8 cups) sifted powdered sugar
1/2 cup solid vegetable shortening
ivory gel food coloring
For the red “blood”:
1-2 teaspoons red gel food coloring
1/8 teaspoon black gel food coloring
1/4 cup honey
1/2-1 teaspoon water
1/4 cup strawberry jam
Directions:
For the red “blood”:
1. Mix everything together. If you want a darker red, add in some dark blue. Honey/ Jam is to achieve some sort of shine in the cake. With that I wish you success should you attempt to make your own brain cake.
For the marshmallow fondant:
1. If using homemade marshmallow fondant, prepare fondant the night before. To make your own, microwave marshmallows and 2 tablespoons of water about 30 seconds, stirring until well-combined. Microwave on another 30-second interval, stirring again, continuing up to 2 1/2 minutes, until fully melted and combined.
2. Add in 3/4 of the powdered sugar on top of the melted marshmallow mixture. Fold the sugar into the mixture, then place the solid vegetable shortening into a bowl so that you can dip your fingers in as you work. Grease your hands and work surface generously, then turn the marshmallow mixture onto the greased surface. Knead the dough, adding additional powdered sugar and regreasing hands and counter so that the fondant doesn’t stick. Add additional water to the mixture, 1/2 tablespoon at a time, if the fondant is tearing easily. Continue kneading until the fondant forms a firm, smooth ball that will stretch without tearing (knead about 8 minutes).
3. In some allow fondant to sit, double-wrapped, overnight. Coat fondant with a thin layer of solid vegetable shortening, then wrap in plastic wrap and place in a ziploc bag. Squeeze out as much air as you can from the ziploc bag. When not working with it, make sure to keep covered with plastic wrap or in a bag. When ready to use, knead until smooth, then roll out to 1/8-inch thick.
For the cake:
1. Preheat oven to temperature indicated on the box of cake mix. Prepare a circular or dome-shaped cake pan with nonstick spray.
2. Prepare your cake batter according to box directions. Pour batter into prepared cake pan, then bake according to box directions, until a toothpick inserted comes out clean or with a few crumbs.
3. Once done, remove cake pan from the oven, then allow cake to cool in pan 10 minutes before removing from pan and cooling completely on a cooling rack, about 30 minutes to 1 hour.
4. If your cake does not look like an oval dome, use a knife to carefully trim away the cake until it is “brain” shaped.
5. Cover the cake evenly in a thin layer of buttercream frosting. Set the frosted cake in the refrigerator for 30 minutes to 1 hour to set the frosting.
6. Mix the fondant with the ivory gel food coloring to get a skin tone color. Remove a small portion of the fondant and roll into long “worms.” When ready to decorate the cake, squiggle the fondant “worms” randomly all over the cake, making sure to maintain a dividing line through the center of the left and right “brains.” Continue until the entire cake is covered, then place back into the refrigerator until ready to cover with red “blood.”
7. To make the blood, in a small bowl, mix together red gel food coloring, black gel coloring, honey, water, and strawberry jam. Adjust the amounts until the desired consistency is achieved.
8. Using a pastry brush, brush the “blood” onto the cake. If you want more shine, add a bit more honey or red gel coloring to the mixture. Continue brushing until the cake is covered as you like. Slice up serve. Enjoy!
Check out how easy it is in this video:
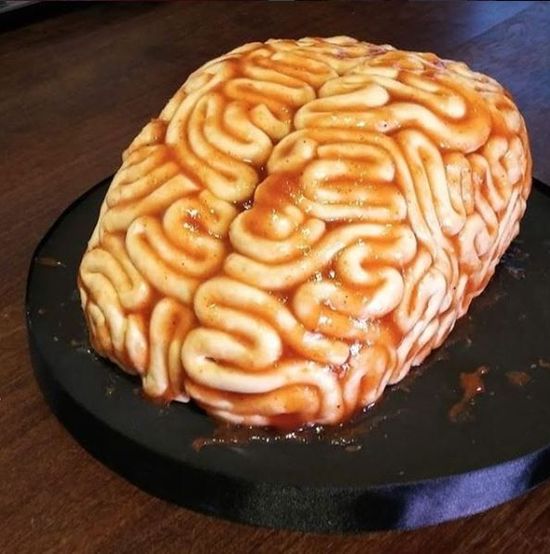
This is what it looks like when you make it out of Carmel.
You can even add a graduation cap to make a neat gift.

H/T: Shared Food